Cannabis Cloning, Cuttings How to
Cannabis cloning - Cloning is a process in which part of a plant is taken, caused to take root and develop into a new plant. Cloning is a genetic duplication of the mother plant from which it is taken and is identical to the mother plant in all traits. The cuttings are taken before the transition to flowering, during flowering, the hormonal balance in the plant changes and the success rates decrease significantly. Most growers own several plants from which cuttings are taken. As long as we want to take cuttings from a plant if we do not flower it.
Clones have many benefits:
Plant species: Cloning is an exact replication of the plant from which it is taken (mother plant) which means that it has the same genetic traits as the mother plant - if the mother is female, the plant that will grow from the cutting is also female.
No need for seeds: if you take cuttings there is no need to get organized on seeds, once we have a quality mother plant, you can take from it some cuttings we want without having to get organized on expensive or unavailable seeds.
Time-saving, cuttings save us the whole process of germination and initial growth.
Growers like to cultivate mother plants from several different varieties and keep a variety of different, high-quality cannabis types.
So what do you need to get successful clones?:
- Mother plant
- Preferably 4X4 rock wool cubes
- Rooting gel
- Propagator (Greenhouse)
- Water sprayer
- Sterile scalpel
- Rooting fertilizer
Preparation instructions for cannabis cutting:
The day before we take the cuttings the plant can be watered well.
We will take rock wool cubes and soak them for 4 hours in mineral water. After soaking, we will remove the cubes from the water and stack them to remove excess water.
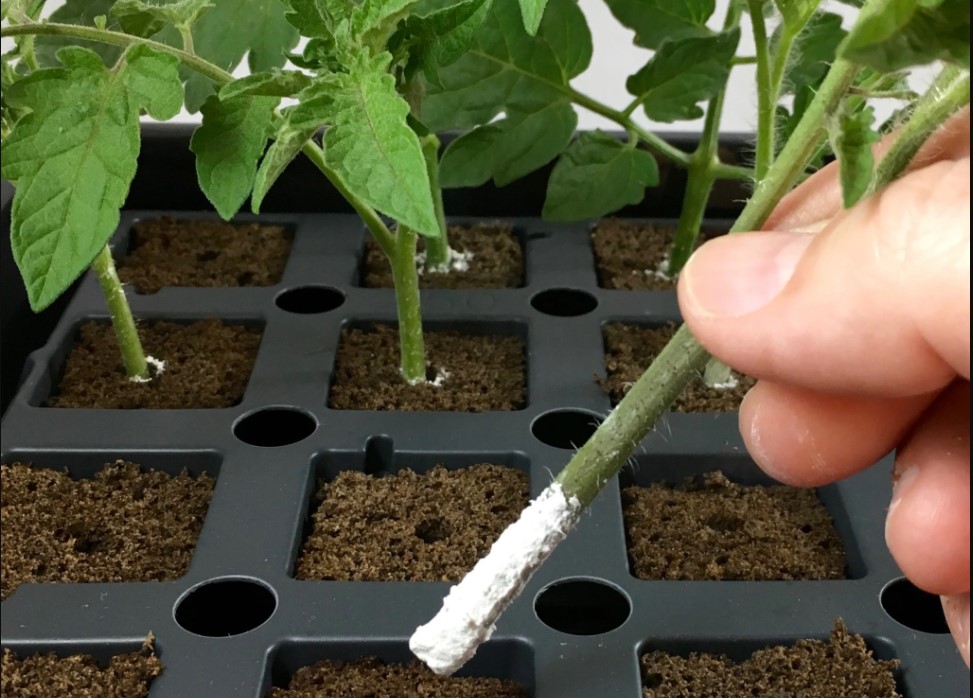
Pour the rooting gel/powder into a small vessel. We do this so as not to dip the cuttings in the Cloning solution container which will contaminate the entire contents of the bottle.
Chosen in a healthy and relatively young part of the mother plant. The length of the cutting should be 7-10 cm. We will remove the large leaves at the bottom of the branch and leave 3 or 4 small leaves at the top.
We will cut the cuttings from the mother plant in a clean and diagonal cut using a sterile scalpel. Immediately after removing the cutting from the mother plant, we dip the cutting edge in the rooting compound, stick the cutting in a cube of rock wool and place it in the propagator. We will repeat this operation until we have enough cuttings. Keep in mind that not all cuttings will take root so you should take more cuttings than we would like to grow. Pour a little water with a low dose of rooting fertilizer into the bottom of the propagator and close the lid.
Part two of Cloning
In the first week after cutting, 100% humidity must be maintained in the propagator in order to provide the new plants with the option of drinking water from the air. The propagator should be ventilated four times a day to prevent the formation of mould. Open the plastic lid, let fresh air in and spray the plants and the container with water. After about 7-14 days, roots will begin to emerge from the rock wool cubes.
After we have seen roots protruding from the bottom of the rock wool cubes, we will put the cuttings with the cubes in a substrate in which we will grow the plant - soil, coco-perlite or a hydroponic crop.
tips:
It is recommended that the mother plant be at least six weeks old, after a number of cuts the success rate of cuttings absorption increases.
It is advisable to root the cuttings under a fluorescent bulb (CFL) close to the cuttings (10 cm) and after a few days put the propagator with the cuttings under growing bulbs at a distance of one and a half meters from the propagator. At this point, you can also add fertilizer. The rooted cuttings should be transferred to full light gradually and carefully.
Cuttings like relatively low temperatures. It is advisable to be in the range of 22-24 degrees Celsius.
If you have several plants you should mark from which plant if any pruning came using a marking sign


Comments
Post a Comment